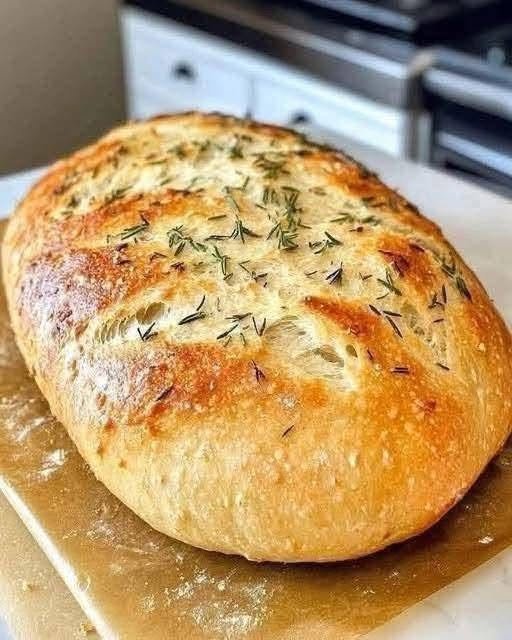
There is nothing quite like the aroma of freshly baked artisan bread filling your home, especially when it features the savory, earthy combination of fragrant fresh rosemary and rich garlic.
The beauty of the no-knead method is that it skips all the exhausting arm work, using time and long fermentation instead of muscle to develop incredible, bakery-quality texture with a shatteringly crisp crust and a chewy, airy crumb.
Here is how to bake a foolproof No-Knead Rosemary Garlic Artisan Bread right in your own kitchen using a standard cast-iron Dutch oven.
Ingredients
-
3 cups (360g) unbleached all-purpose flour (or bread flour for a slightly chewier crust)
-
1 3/4 tsp fine sea salt or kosher salt
-
1/4 tsp instant yeast (active dry yeast works too; just mix it with the warm water first)
-
1 1/2 cups (350ml) lukewarm water
-
3 tablespoons fresh rosemary leaves, finely chopped
-
3 to 4 cloves garlic, finely minced (or 2 tablespoons of roasted garlic cloves for a sweeter, deeper flavor)
-
Optional Extra: A drizzle of olive oil to toss the minced garlic in before folding it into the dough.
Step 1: Mix the Shaggy Dough (5 Minutes)
-
In a large mixing bowl, whisk together the flour, salt, and instant yeast.
-
Stir in the finely chopped fresh rosemary and minced garlic, ensuring they are evenly distributed through the dry ingredients.
-
Pour in the lukewarm water. Using a wooden spoon, spatula, or even your hand, mix just until a wet, sticky, and “shaggy” dough forms and no dry flour pockets remain. (Do not knead it; it should look messy).
-
Cover the bowl tightly with plastic wrap or a damp kitchen towel.
Step 2: The Long, Slow Rise (12 to 18 Hours)
-
Leave the bowl on your kitchen counter at room temperature out of direct sunlight for 12 to 18 hours.
-
What to look for: During this time, wild gluten development and yeast fermentation will occur naturally. When ready, the surface of the dough should be dotted with bubbly foam, and the dough will have doubled in size and smell wonderfully yeasty and aromatic.
Step 3: Shape and Second Rise (30 to 45 Minutes)
-
Generously dust your hands and a clean work surface (or a piece of parchment paper) with flour, as the dough will be quite sticky.
-
Gently deflate the dough by releasing it from the sides of the bowl and turning it out onto your floured surface.
-
Lightly fold the edges of the dough toward the center a few times to form a loose, round ball (boule).
-
Place the dough seam-side down onto a sheet of parchment paper. Dust the top lightly with a little flour, cover it loosely with a towel, and let it rest and puff up slightly for 30 to 45 minutes.
Step 4: Preheating the Dutch Oven (Crucial for Crust)
-
While your dough is finishing its second rest, place a heavy cast-iron Dutch oven (with its matching lid) inside your oven.
-
Turn your oven on and preheat it to 450°F (230°C).
-
Why this matters: Heating the pot beforehand turns your Dutch oven into a miniature professional bread oven, trapping steam from the high-hydration dough to create that iconic blistered, crackly crust.
Step 5: Baking to Golden Perfection
-
Once the oven and Dutch oven are fully preheated, carefully remove the hot pot from the oven and take off the lid.
-
Grab the corners of the parchment paper holding your dough and lift it carefully, lowering the entire parchment sling (with the dough on it) straight down into the hot Dutch oven.
-
Place the lid back on top to trap the steam.
-
Bake covered at 450°F (230°C) for 30 minutes.
-
Carefully remove the lid (watch out for escaping steam!) and bake uncovered for another 12 to 18 minutes, until the crust turns a deep, golden mahogany brown and sounds hollow when tapped.
Step 6: Cool Before Slicing
-
Use the parchment paper to lift the loaf out of the Dutch oven and transfer it to a wire cooling rack.
-
The Hardest Step: Let the bread cool completely for at least 45 to 60 minutes before slicing. Cutting into hot bread causes the internal starches to gum up and compromises the texture.
Once cooled, slice it thick, spread a pat of high-quality butter or olive oil over the top, and enjoy the incredible crust and savory garlic-rosemary flavor!
