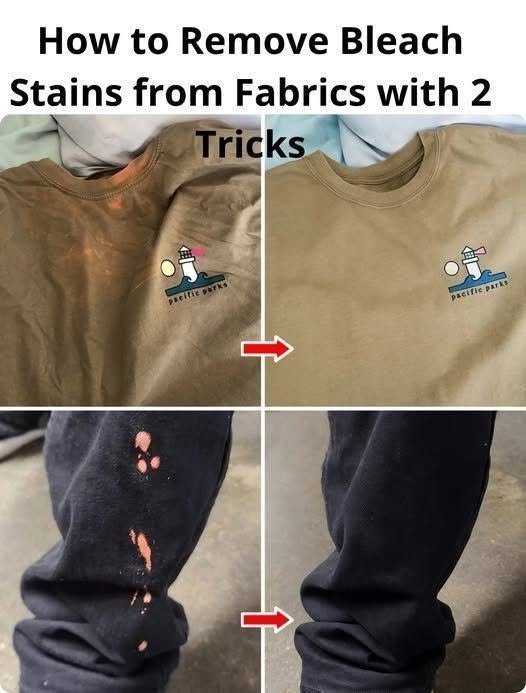
When you discover a bright, faded spot on a favorite colored garment, it feels like permanent damage. Because sodium hypochlorite (bleach) chemically destroys the dye molecules in fabric rather than just depositing a stain on top, conventional washing cannot reverse it.
The underlying chemical and textile reality is straightforward: you cannot “clean” a bleach stain out, but you can neutralize the residual chlorine and either re-color the spot or lift surrounding dye to mask it.
Two evidence-based, practical methods help rescue garments ruined by accidental bleach splashes.
Method 1: The Neutralization & Fabric Dye Trick (Best for Dark or Bright Clothes)
If the garment is a dark color, a solid hue, or heavily patterned, neutralizing the bleach and using targeted fabric dye is your most reliable fix.
-
Neutralize the Bleach Immediately: If the spill just happened, rinse the area thoroughly with cold water or a mixture of 1 tablespoon sodium metabisulfite (or white vinegar mixed with water) to stop the chemical reaction. If left active, bleach continues to weaken the cotton fibers.
-
Prep the Fabric: Wash the garment to remove any residual detergent or finishes. Leave it slightly damp.
-
Mix a Precision Dye Solution: Purchase a small bottle of liquid fabric dye (such as Rit) that matches your garment’s exact color. Mix a few drops of dye with a little warm water in a small cup.
-
Apply with a Cotton Swab: Dip a Q-tip or fine artist’s paintbrush into the concentrated dye solution and carefully dab it directly onto the bleached white spot. Because bleached cotton absorbs dye very rapidly, start with a light touch.
-
Set the Color: Let the dye sit for 2 to 3 minutes, then blot away any excess with a paper towel. Heat-set the dye by pressing a hot iron over the spot (with a pressing cloth in between to protect your iron), then rinse the garment in cold water once cool.
Method 2: The Alcohol “Feathering” Trick (Best for Printed or Heather Fabrics)
If the bleach stain is small and located on a patterned, multi-colored, or heather-blend fabric, you can often “bleed” surrounding dye back into the bleached void.
-
Grab Isopropyl Alcohol and a Cotton Swab: Standard 70% or 91% rubbing alcohol acts as a mild solvent for many fabric dyes.
-
Test an Inner Seam: Dab a tiny bit of rubbing alcohol on an inside hem to ensure the fabric’s surrounding dye doesn’t bleed uncontrollably.
-
Dab and Feather Outward: Dip your cotton swab into the rubbing alcohol and gently dab the edge of the colored fabric right next to the bleach spot, pressing inward toward the white area.
-
Migrate the Pigment: The alcohol will slightly loosen the surrounding dye molecules, allowing them to migrate into the bleached, stripped fibers. Gently feather the edges so the transition blends seamlessly into the pattern.
-
Heat Set: Once you are satisfied with the blend, let it air dry completely, then run a warm iron over the spot to lock the pigment back into the fibers.
The Takeaway
Ignore the myth that bleach stains are an automatic death sentence for your clothes. While you can’t undo the chemical stripping of original color, neutralizing the bleach and either manually re-dying the spot or feathering surrounding pigment can save garments you thought were ruined.
