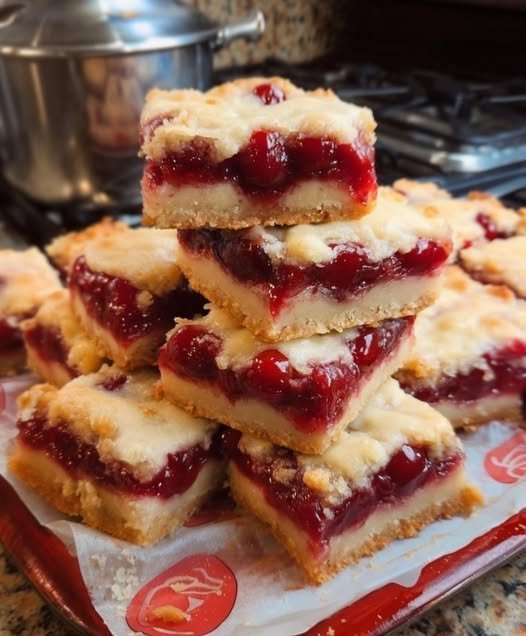
Cherry Pie Bars

When you want all the gooey, fruit-filled comfort of a classic homemade cherry pie without the hassle of rolling out a finicky double crust, Cherry Pie Bars are a phenomenal addition to your culinary manual.

By combining a buttery, shortbread-like crust that doubles as the crumb topping with a tart-sweet cherry filling, these bars deliver incredible texture and portability while slicing into neat, bakery-quality squares.

The Culinary Secret: Double-Duty Dough

The magic of these bars lies in efficiency and structural contrast:
  • One Dough for Base and Topping: Instead of making separate pastry crusts, you press two-thirds of the rich, buttery mixture into the bottom of the pan to form a sturdy base, and crumble the remaining third over the top.
  • The Cornstarch Bond: Store-bought or homemade cherry filling can release excess moisture as it bakes. Tossing your cherries with a touch of cornstarch and a squeeze of fresh lemon juice thickens the juices into a glossy, jammy consistency that won’t make your crust soggy.

Cherry Pie Bars Recipe

  • Prep time: 20 minutes
  • Cook time: 40–45 minutes
  • Yields: 16 squares (9×13-inch pan)

Ingredients

  • $2\frac{1}{2}$ cups all-purpose flour
  • 1 cup granulated sugar
  • 1 teaspoon baking powder
  • $\frac{1}{4}$ teaspoon salt
  • 1 cup (2 sticks) unsalted butter, cold and cut into small cubes
  • 2 large eggs, lightly beaten
  • 1 teaspoon vanilla extract
  • 2 cans (21 oz each) high-quality cherry pie filling (or 4 cups of homemade cooked cherry filling)
  • 1 tablespoon fresh lemon juice (to brighten the fruit flavor)
  • Optional glaze: 1 cup powdered sugar mixed with 2 tablespoons milk and $\frac{1}{2}$ teaspoon almond extract
1.Mix Dry Ingredients:Whisk flour, sugar, baking powder, and salt together.

Preheat your oven to $375^\circ\text{F}$ ($190^\circ\text{C}$) and line a $9\times13$-inch baking pan with parchment paper, leaving an overhang on the sides for easy removal later. In a large mixing bowl, whisk together the flour, granulated sugar, baking powder, and salt.
2.Incorporate the Butter:Cut in cold butter until the mixture resembles coarse sand.

Add the cubed cold butter to the flour mixture. Using a pastry blender, two forks, or your clean fingers, cut the butter into the flour until the mixture resembles coarse, sandy crumbs with pea-sized pieces of butter remaining.
3.Add Eggs and Vanilla:Stir in eggs and vanilla until a crumbly dough forms.

Stir in the beaten eggs and vanilla extract just until moistened and a crumbly dough forms (it will look dry at first, but keep mixing gently).
4.Form the Crust:Press two-thirds of the dough firmly into the lined baking pan.

Transfer roughly two-thirds of the crumbly dough into your prepared baking pan. Press it down firmly and evenly across the bottom to create a solid crust.
5.Add Filling and Crumble Top:Spread cherry filling evenly over the base, then crumble remaining dough on top.

In a bowl, gently mix your cherry pie filling with the fresh lemon juice. Spoon the cherry mixture evenly over the bottom crust. Take the remaining one-third of the dough and squeeze it into clumps between your fingers, scattering the crumbles haphazardly over the top of the fruit.
6.Bake and Cool:Bake for 40 to 45 minutes until golden brown, then cool completely.

Bake on the middle rack for 40 to 45 minutes, or until the crumb topping is deeply golden brown and the cherry filling is bubbling around the edges. Crucial Step: Let the bars cool completely at room temperature, then chill in the refrigerator for at least 1 hour so the fruit filling and buttery crust set properly before slicing into squares.

Serving Suggestions

Once cooled and sliced, these bars are incredible on their own, but you can elevate them for dessert by adding:
  • A drizzle of sweet almond glaze across the top.
  • A scoop of vanilla bean ice cream or a dollop of freshly whipped cream.

Leave a Comment