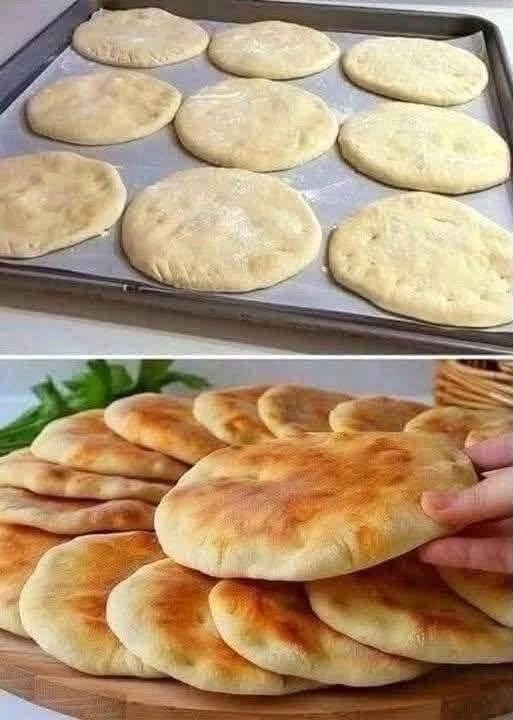
Making homemade pita bread at home is surprisingly simple, and it relies on one brilliant piece of kitchen science: trapped steam.
When rolled-out dough hits a scorching-hot surface, the water inside the dough rapidly turns to steam. Because the outer layers of the dough cook and seal almost instantly, that steam has nowhere to escape. It balloons the center of the pocket, creating the signature hollow pocket that makes pita so satisfying.
Here is an evidence-based, foolproof guide to making restaurant-quality pita bread right in your own kitchen using a simple skillet.
Ingredients (Makes 8 Pitas)
-
Warm Water: 1 cup (about 105°F to 110°F—warm to the touch, like a baby’s bathwater)
-
Active Dry Yeast: 2 tsp (or 1 packet)
-
Sugar or Honey: 1 tsp (to feed the yeast)
-
All-Purpose Flour or Bread Flour: 2 ½ to 3 cups (Bread flour gives a slightly chewier texture due to higher protein content)
-
Olive Oil: 2 tbsp
-
Salt: 1 ½ tsp
Step-by-Step Instructions
1. Activate the Yeast
In a large bowl or the bowl of a stand mixer, combine the warm water, yeast, and sugar. Stir gently and let it sit for 5 to 10 minutes until it becomes frothy and bubbly. This proves your yeast is alive and ready to work.
2. Mix and Knead the Dough
-
Add the olive oil, salt, and 2 ½ cups of flour to the yeast mixture.
-
Mix until a shaggy dough forms. If it is too sticky, add the remaining ½ cup of flour a little at a time.
-
Knead (either by hand on a lightly floured surface for 8–10 minutes, or with a dough hook on a stand mixer for 5–7 minutes) until the dough is smooth, elastic, and slightly tacky, but not sticking to your fingers.
3. First Rise
Lightly oil a clean bowl, place the dough inside, and turn it over so it’s coated in oil. Cover the bowl with a damp towel or plastic wrap. Let it rise in a warm spot for 1 to 1.5 hours, or until it has doubled in size.
4. Divide and Rest
-
Punch the risen dough down to release the air, and transfer it to a clean work surface.
-
Divide the dough into 8 equal pieces and roll each piece into a smooth ball.
-
Cover the dough balls with a damp towel and let them rest for 15 to 20 minutes. (Don’t skip this step! Resting relaxes the gluten, making the dough much easier to roll out without springing back.)
5. Roll Out the Pitas
-
Heat a heavy-bottomed skillet (cast iron works best) over medium-high heat until it is ripping hot. Do not add oil or butter to the pan; you want a dry, blistering heat.
-
Take one ball of dough, flatten it slightly with the palm of your hand, and use a rolling pin to roll it out into a circle or oval about 1/4-inch thick. Roll in one direction, lift, and rotate—avoid pressing too hard, or you’ll seal the edges and prevent the pocket from forming.
6. Cook to Perfection
-
Place your rolled-out dough directly onto the dry, hot skillet.
-
Watch closely: within 30 to 45 seconds, you should see tiny bubbles start to form across the surface.
-
Flip the pita. As it cooks on the second side (about 1 to 2 minutes), it should begin to puff up dramatically into a balloon.
-
Press down gently with a spatula on any spots that lag behind to help distribute the steam.
-
Flip one last time for about 15–30 seconds to get a few light golden-brown spots, then remove from the heat.
7. Keep Them Soft
As you finish cooking each pita, stack them inside a clean kitchen towel or a covered container. The trapped residual steam inside the towel softens the exterior, keeping your pitas pliable, fluffy, and easy to fold or stuff.
Pro-Tips for Success
-
High Heat Is Non-Negotiable: If your pan isn’t hot enough, the water inside won’t vaporize quickly enough to create steam, resulting in flat, cracker-like flatbreads instead of puffy pitas.
-
Can You Bake Them Instead? Yes! If you prefer oven baking, preheat your oven and a heavy baking sheet or pizza stone to 450°F to 500°F (230°C to 260°C) for at least 30 minutes. Bake the rolled-out dough directly on the hot stone for 3 to 4 minutes until they puff up.
