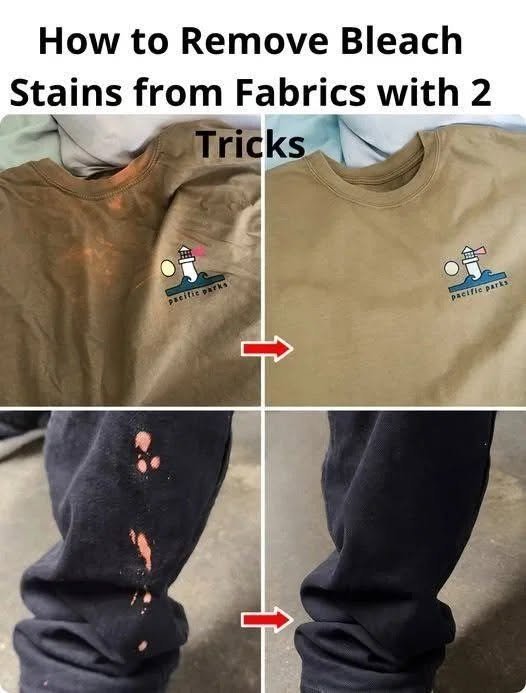
When viral cleaning hacks promise a magic trick to “wipe away” a bleach stain from your favorite colored shirt, they often skip a crucial scientific reality: bleach doesn’t actually leave a stain.
Unlike coffee, grease, or ink, which deposit foreign matter onto a fabric, chlorine bleach is an aggressive oxidizing agent that permanently destroys the dye molecules within the textile fibers themselves. Because the color is gone, you cannot simply “wash” a bleach mark out. Instead, saving a bleached garment requires chemical neutralization followed by one of two practical restoration techniques designed to mask or replace the lost color.
Step 0: Neutralize the Bleach First
Before attempting any repair, you must stop any residual bleach from continuing to degrade the fabric fibers.
-
Rinse the area thoroughly with cold water.
-
Mix a small amount of baking soda and water into a thick paste, apply it to the spot, let it dry, and brush it off. This neutralizes active chlorine residues.
Once neutralized, you can use these two popular household tricks to salvage the garment.
Trick 1: The Rubbing Alcohol Color-Bleed Method
Best for: Dark or brightly colored cotton and synthetic blends with small bleach spots.
This technique uses isopropyl (rubbing) alcohol to physically loosen surrounding dye molecules and feather them into the bleached void.
-
Prep the Area: Lay the garment flat on a clean, hard surface with a paper towel tucked underneath the stained layer to catch excess liquid.
-
Apply Alcohol: Dip a cotton swab or cotton ball into standard rubbing alcohol (70% or higher).
-
Feather Inward: Starting from the outer edges of the bleached spot and working your way inward toward the center, gently dab and rub the fabric.
-
Transfer the Dye: The alcohol will temporarily dissolve and bleed the surrounding factory dye into the bleached area. Continue until the color fills the gap, then let it air dry and heat-set it by tossing the garment in a low-heat dryer or pressing it with a warm iron.
Trick 2: Precision Fabric Markers or Acrylic Ink Touch-Up
Best for: Solid-colored garments, dark denim, or situations where rubbing alcohol isn’t enough to match deep hues.
If surrounding dyes cannot be coaxed into the bleached area, you can manually replace the missing pigment.
-
Select Your Medium: Use a permanent fabric marker, a standard permanent marker (like a Sharpie matching the garment’s shade), or a tiny drop of acrylic paint mixed with textile medium.
-
Test First: Always test your marker color on an inside seam or hidden hem of the garment first, as wet ink often dries darker than expected.
-
Apply Sparingly: Using the tip of the marker or a fine-art paintbrush, carefully “color in” the bleached void.
-
Blend: While the ink is still slightly damp, gently blot it with a clean cloth or a cotton swab dipped in rubbing alcohol to feather the edges so the repair blends seamlessly into the surrounding weave.
The Bottom Line
While you can’t magically reverse chemical oxidation, these two tricks offer a reliable way to disguise bleach accidents and rescue garments from the rag pile.
